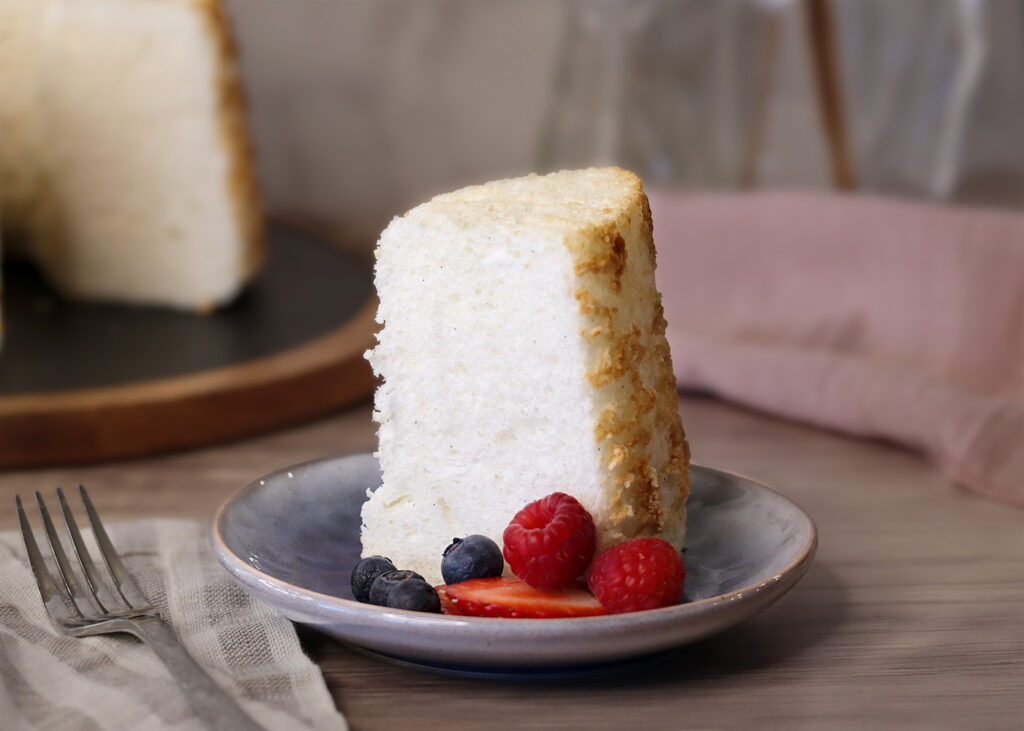
Angel Food Cake
As soon as you hear the words “angel food cake,” your mind instantly brings forth images of a snowy white interior, a golden exterior, and a delicate, tender crumb. It’s so light and airy it seems to float rather than rest on the serving platter. This recipe provides everything you expect from an angel food cake in the form of an exceptionally tall show-stopping cake that uses 18 (yes, you read that right – 18) egg whites to completely fill a 10-inch diameter, 5-inch tall angel food cake pan.
I think my first experience making angel food cake was from a boxed mix when I was a teenager. It was one of my favorite cakes to make and eat, I loved the soft, pillowy texture that always reminded me of marshmallows. I even remember mom and I making a pair of angel food cakes for a bake sale when I was in high school – but those were also from boxed mixes. I can’t quite recall when I saw her make her homemade angel food cake recipe for the first time – but I do remember thinking “oh, so that’s how you make a real angel food cake!”
As I mentioned, her recipe calls for a whopping 18 egg whites which equates to about 2 cups of whites – this far exceeds the more common 10-12 egg whites (or 1 1/2 cups) most modern recipes call for. From what I could find, this recipe probably originated in the mid‑1900s, when manufacturers started producing large 10‑inch tube pans that were 4+ inches deep. The timing is also borne out by the instruction to sift the dry ingredients five times – a hold over from when flour was not milled quite so finely and additional sifting helped remove larger bits as well as aerating and separating the particles. With modern cake flour and powdered sugar one or two passes through the sifter is plenty.
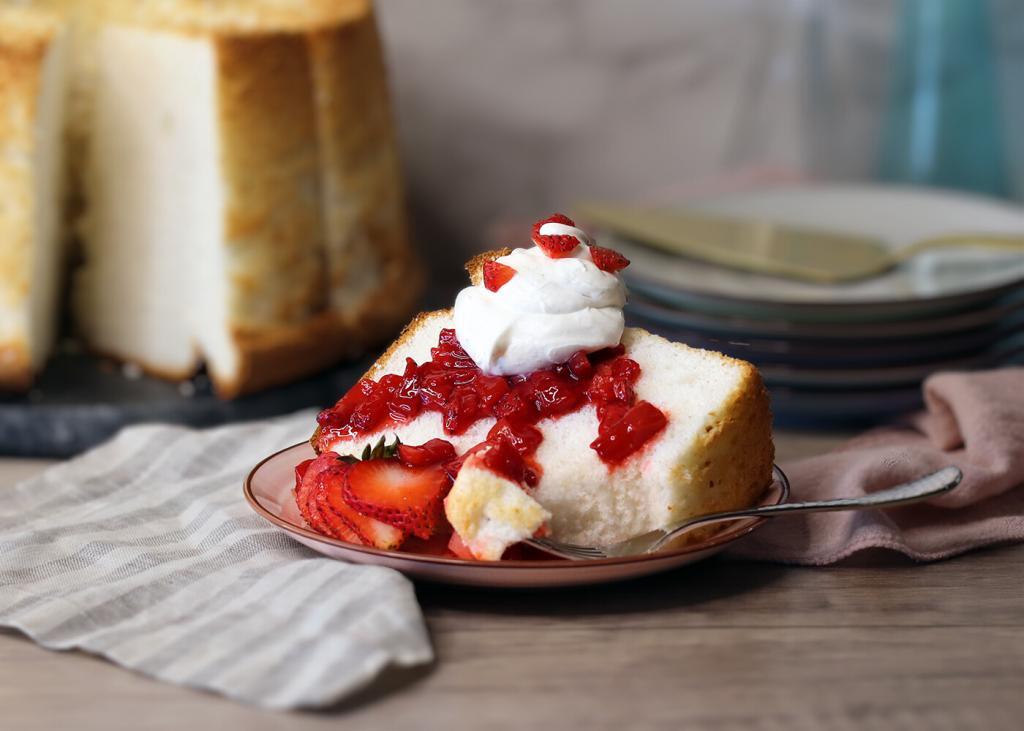
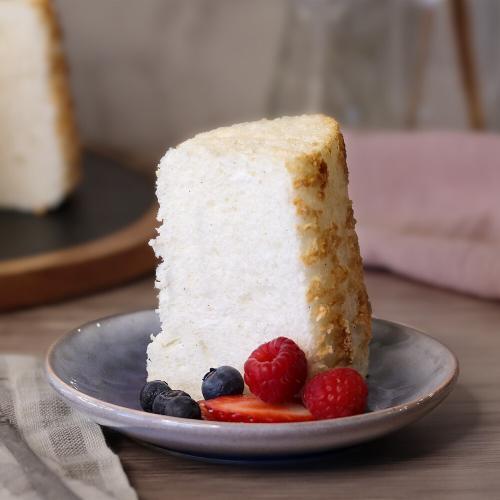
One of the things I love most about angel food cake is its versatility. It tastes divine on its own, but the vanilla kissed flavor and tender texture act as a blank canvas for any number of topping combinations. It is most commonly served with fresh berries, or – as pictured below – with macerated berries and whipped cream which can give strawberry shortcake vibes.
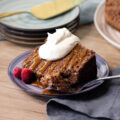
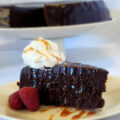
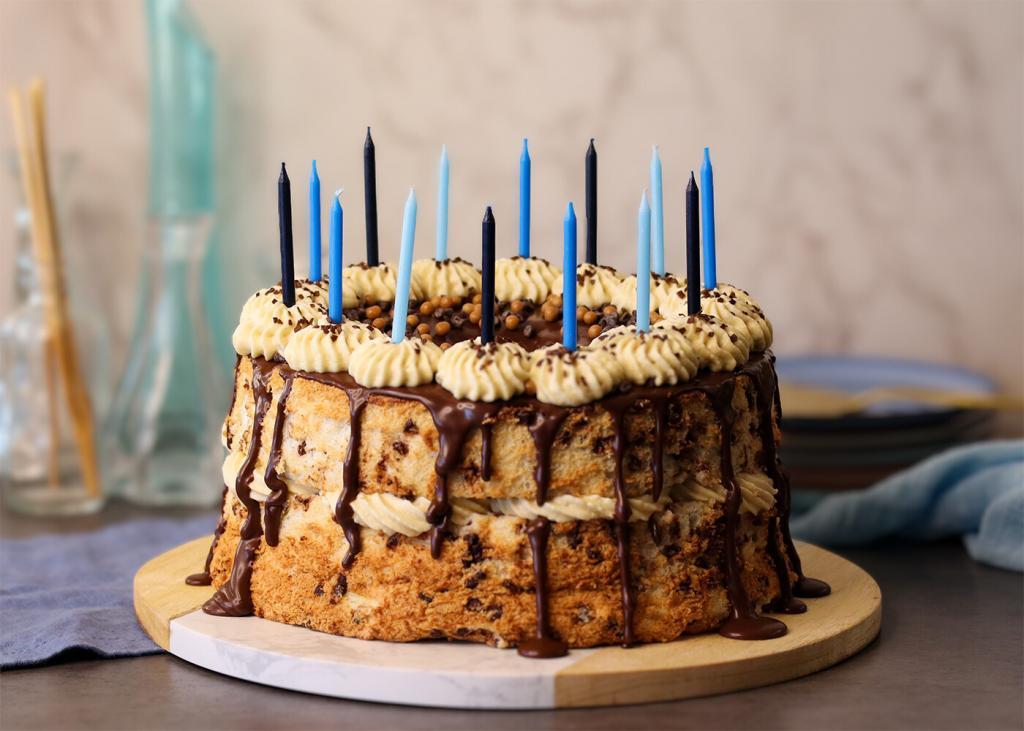
I’m sure it won’t be a surprise to any of you to discover that my favorite way to eat angel food cake is drizzled with fudge and caramel sauces and topped with fresh whipped cream. Turns out my son is a boy after my own heart – this year for his birthday he requested angel food cake…make that chocolate chip angel food cake with caramel mascarpone cream filling, a chocolate ganache glaze and more caramel cream to top it all off. It was still the same angel food cake at its core — just dressed up for a celebration.
Whether you dress it up, dress it down, or enjoy it completely plain, I hope you’ll give this homemade angel food cake a try. It really isn’t much more complicated than the boxed mix, both rely on whipping in plenty of air and cooling the cake fully upside down in its pan. To help you feel confident from the very first attempt, I’ve added a few helpful notes to the recipe card and shared extra tips and tricks in this week’s Sweet Byte newsletter.
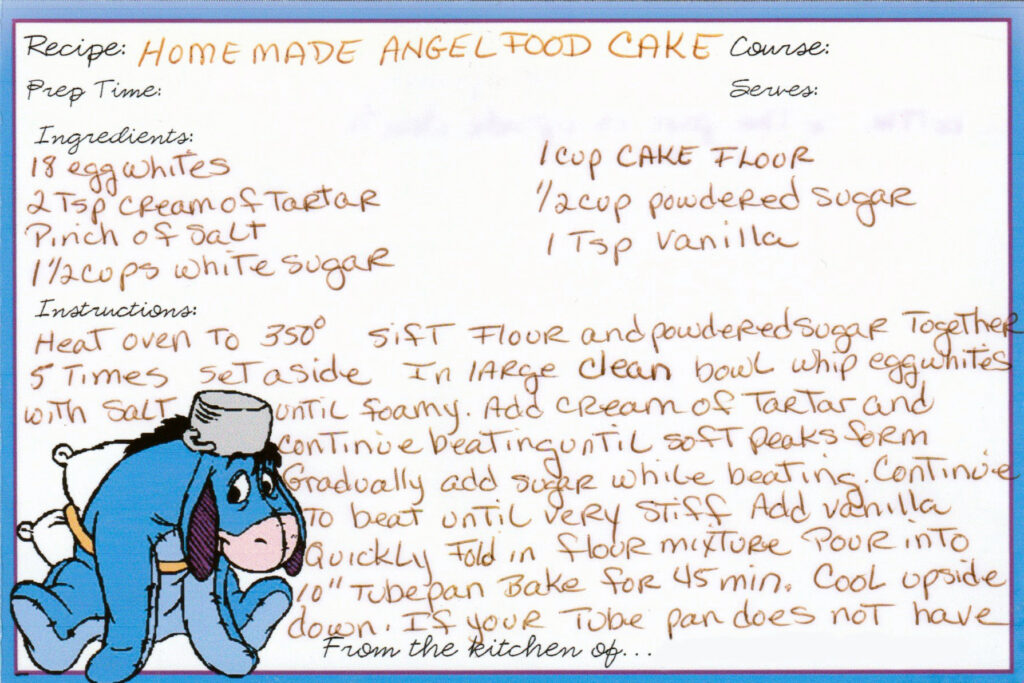
Angel Food Cake
Equipment
Ingredients
Method
- Pre-heat oven to 350°F.
- Sift the flour and powdered sugar together 5 times (This is a very old recipe, I found that 2 times is sufficient for modern ingredients). Set aside.1 cup (120 g) cake flour, 1/2 cup (60 g) powdered sugar
- In large clean bowl, use an electric mixer with the whisk attachment to whip the egg whites with the salt until foamy.18 (540 g) egg whites, 1/4 tsp (1 g) salt
- With the mixer running, gradually add the cream of tartar and continue beating until soft peaks form.2 tsp (7 g) cream of tartar
- With the mixer running, gradually add the sugar and continue to beat until it forms very stiff peaks. Add the vanilla and beat to combine.1 1/2 cups (300 g) white sugar, 1 tsp (5 ml) vanilla
- Sift the flour mixture over the top of the egg whites. Quickly and gently fold it in until no streaks or pockets of dry ingredients remain.
- Spoon the batter into a 10" tube pan, gently run a thin knife through the batter in a zigzag pattern to release any large air pockets, then smooth the top.
- Bake in the preheated oven for 38-42 min until the top is light golden brown and springs back when pressed gently (or to an internal temperature of 206°F). Turn the pan upside down to cool (If your tube pan does not have little feet on it, put the opening of the tube on a bottle so the pan is upside down). Allow the cake to cool completely in the pan (at least two hours).
- Gently run a thin knife or spatula around the sides to loosen the from the pan. Slide the cake out and run your knife or spatula between the tube insert base and the cake. Gently twist or pull the cake to loosen it from the tube and then invert onto a serving plate. Serve plain, with fresh fruit, or drizzled with your favorite topping and a dollop of whipped cream.
Notes
- If your egg whites whip to full volume, this batter will be too much for a standard 4.5–5 quart mixer bowl. You’ll need at least a 6‑quart bowl (I only had a few inches of clearance in my 8‑quart!) to give the whites enough room to expand and to fold in the dry ingredients without deflating them.
- Wipe your mixing bowl and whisk attachment with a little lemon juice to remove any traces of fat— even a tiny amount can keep the egg whites from whipping to full volume.
- With so many eggs to crack and separate, it’s worth using a small bowl for each egg. That way, if a yolk breaks, you only lose one egg instead of the whole batch you’ve already added to your mixing bowl.
- All the lift in this cake comes from the air in the whipped egg whites, so protect that foam. Add ingredients gradually and resist the urge to dump anything in all at once.
- Don’t skip the upside‑down cooling step—it keeps all those tiny air pockets open so the cake maintains its height as it cools and sets.