Mini Pavlova
Pavlova is an Australian (or New Zealand… or perhaps neither!) dessert named for Russian ballerina Anna Pavlova. Some say its billowy shape was inspired by her tutu; others claim it was created to be as light as the dancer herself. At its core, pavlova is a baked meringue topped with lightly sweetened, vanilla‑scented whipped cream and fresh fruit. The hallmark is a crisp outer shell that gives way to a pillowy, marshmallow‑soft center, unlike many other baked meringues which are baked until fully crisp. Mini pavlovas deliver all the same textures and flavors, but in an adorable single‑serving format.
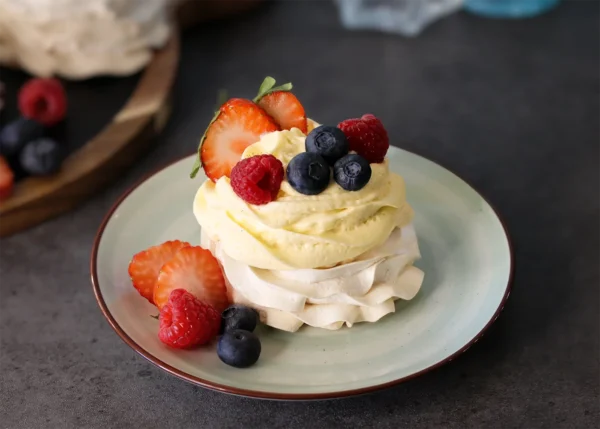
Traditionally, pavlova is made as one large meringue disc piled high with whipped cream and fruit, often something tart or tropical to balance the sweetness of the meringue and the richness of the cream. Modern versions take more liberties by swapping the classic whipped cream for infused creams or mousses (think basil, espresso, rose water, chocolate), or adding curds, custards, syrups, and crunchy elements like toasted nuts. Some bakers even stack multiple meringue layers for double or triple the filling opportunities.
Scaling down to mini pavlovas comes with distinct benefits:
- They’re faster. Smaller bases bake and dry more quickly, meaning you get to the fun part — decorating and eating — much sooner.
- They’re elegant. A full‑size pavlova is stunning before slicing, but once cut, the shell inevitably cracks in unpredictable ways. Individual pavlovas stay pristine and polished.
- They’re creative. Six individual bases mean six chances to play. A full‑size pavlova requires committing to one flavor profile; mini pavlovas let you dress each one differently.
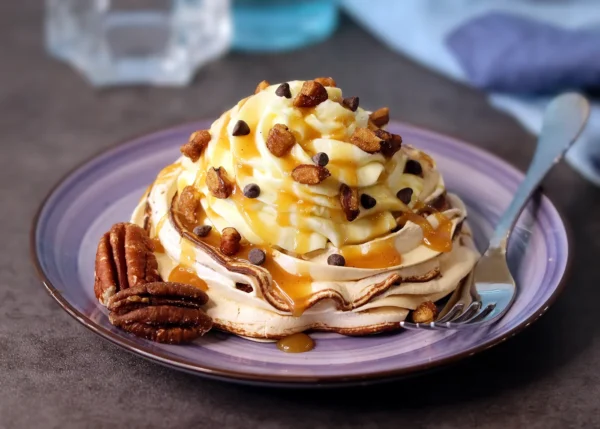
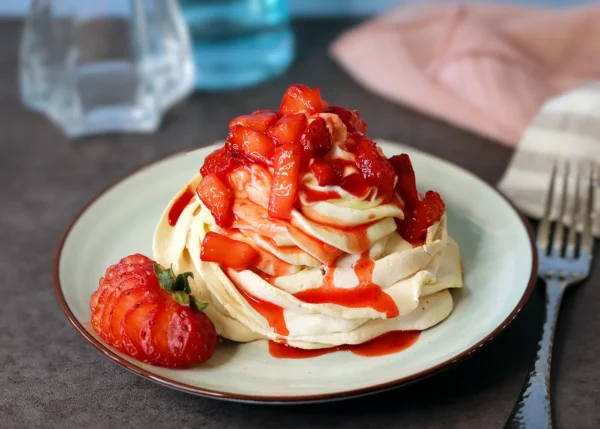
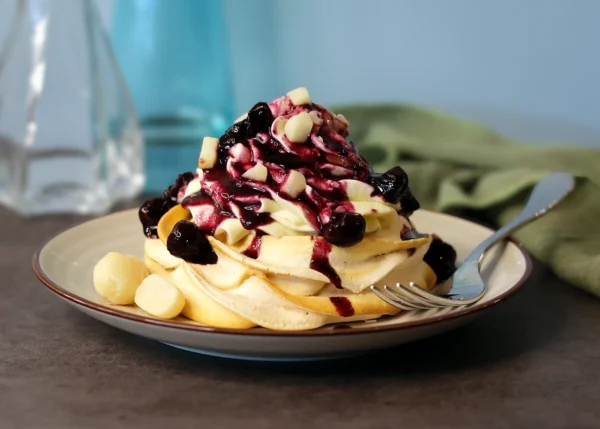
For my mini pavlovas, I didn’t just vary the toppings, I added flavor directly to the meringue by swirling in chocolate. I began with a traditional French meringue, but quickly discovered it was too delicate to handle the added fat from the chocolate; the foam collapsed as soon as I tried to swirl it in. Switching to a Swiss meringue solved the stability issue, but even then, folding chocolate directly into the bowl risked collapse and produced a muddy look.
The solution was to drizzle the melted chocolate inside the piping bag in four to six clean, defined lines before carefully adding the meringue. This technique created a beautiful, controlled swirl throughout each shell. I tested bittersweet and blonde chocolates (both lovely) and I think ruby chocolate would be gorgeous. Milk chocolate would offer a gentler contrast. I don’t recommend white chocolate; it’s too sweet and doesn’t provide enough visual drama.
Of course, the meringue bases — even the chocolate‑swirled ones — are simply a canvas for creative toppings. I chose my Cheesecake Mousse as the cream element. Its rich, tangy flavor complements the marshmallowy meringue and the chocolate ribbons, and it uses the leftover yolks from the meringue, making it a no‑waste win. Cheesecake is also a wonderfully neutral “blank canvas,” so even though I used the mousse for all six pavlovas, each one still became its own distinct dessert:
- Traditional: Fresh sliced strawberries, whole blueberries and raspberries. I used plain bases, but any chocolate swirl works.
- Strawberry Cheesecake: Macerated strawberries spooned over the mousse, syrup and all. Lovely on plain or gold‑swirled bases.
- Blueberry Cheesecake: A blueberry topping (homemade or store‑bought) with chopped macadamia nuts for crunch. Perfect on gold‑swirled bases.
- Turtle Cheesecake: My personal favorite — gooey caramel sauce, chopped honey‑roasted pecans, and a sprinkle of mini chocolate chips. Best on dark‑swirled bases.
Try one, try all, or invent your own combinations. This recipe gives you at least six charming, individual opportunities for creativity.
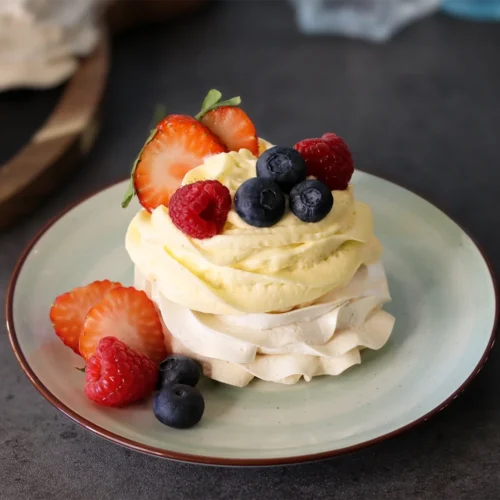
Mini Pavlova
Equipment
Ingredients
Method
- Preheat your oven to 265°F. Line a large baking sheet with parchment paper.
- If you are using the chocolate, put it in a small microwave safe bowl and use either a chocolate melting option (stirring when prompted) or 30 second bursts (stirring in between) in the microwave to melt the chocolate – set aside to cool to room temperature while making the meringue40 g (1 ½ oz) chocolate [bittersweet
- Place sugar, egg whites, salt and vanilla bean paste in a heat proof mixer bowl over a pot of simmering water.125 g (8 ½ tbsp) sugar, 100 g (3-4) egg whites, 1/8 tsp (⅛ tsp) salt, 5 ml (1 tsp) vanilla bean paste
- Whisk continuously until the sugar is fully dissolved and the mixture reaches 150°F.
- Remove from the heat and, using a electric mixer fitted with a whisk attachment, beat until the mixture is thick, glossy, white, has doubled in volume, holds a firm, but not stiff, peak and is cooled to room temperature (about 10-15 minutes).
- Prepare a piping bag fitted with a large piping tip of your choice (I like an open star tip like 1M, a 4B is another good option – something with about a 1/2 inch or so opening).
- If you are using the chocolate, drizzle it in 4 – 6 evenly spaced lines down the inside of the piping bag. Carefully transfer your meringue to the piping bag, try to avoid disturbing the lines of chocolate. If you are not using the chocolate, simply transfer the meringue to your piping bag.
- Pipe the meringue into disks or shallow mounds about 3 1/2 inches in diameter. Use the back of a spoon to make a shallow indent in the middle of each disk/mound.
- Place in the preheated oven for about 30-35 minutes – you want a crisp exterior and a soft, marshmallow-y interior. Turn off the oven and let cool in the oven for another 30 minutes. Remove from the oven and allow to cool completely on the baking tray.
- To serve, transfer your pavlova bases to individual dessert plates, fill the hollow on each with cream and top with fresh berries or chopped fruit, macerated berries or fruit, your favorite fruit topping or filling, or, for a more indulgent finish, drizzle with fudge and/or caramel sauce and top with chopped nuts.
Notes
- If you don’t have a piping bag and tips, you can spoon the meringue into 6 evenly sized dollops on the prepared baking sheet – still use the back of a spoon to make a shallow indent into the middle of the dollops.
- If you want to use the chocolate without a piping bag, drizzle it over the finished meringue. Then, lightly and quickly swirl it in before immediately spooning into your 6 evenly sized dollops.
- If it is particularly humid day, the pavlova may not form a true crust in the oven. They will still be dry rather than tacky, but may feel soft and give slightly when you touch them. The crust will form as they fully cool.
Private Notes
Nutrition
Tried this recipe?
Let us know how it was!More recipes you might enjoy:
About The Author