Choco Peanut Butter Cups
Have you ever looked at a thumbprint cookie and thought it was a bit of a tease? How much filling can realistically be contained in a thumbprint? I’ll tell you, not very much at all. Most thumbprint recipes call for a scant 1/2 to 1 teaspoon of filling, barely enough to even register the flavor. In contrast, these Choco Peanut Butter Cups are cookies that contain a full two tablespoons of filling, that is anywhere from 6 to 12 times as much as a thumbprint cookie! Not only that, but they have two separate fillings and a pleasing pop of color and texture in the form of mini M&Ms.

This week’s heirloom recipe, these Choco Peanut Butter Cups were one of the more recent additions to my mother’s holiday lineup (recent being a somewhat relative term as I recall her adding these while I was in college). The chewy peanut butter cookie cups filled with layers of creamy peanut butter and chocolate ganache were an instant favorite for most of the family. In particular, my younger brother and his kids singled this out as one of their top picks among all the recipes mom made. Of course, if they hadn’t, I probably would have chosen to make them anyway, as they are definitely one of my favorites 🙂
As I mentioned, this recipe was one mom added to her Christmas trays while I was in college. I remember having a phone conversation with her about one of her first attempts at making these. She was complaining about the cookie dough rising up over the top of the mini muffin cups, forming a broad brim and in some cases merging into the neighboring cups. The dough that extended beyond the edges of the muffin cup baked extra crunchy, made it difficult to remove the individual cookie cups from the pan and would have made these particularly unwieldly to arrange on the cookie trays. It threw off the eating experience a bit as well, as you needed to get past that extra border of cookie to get at the creamy filling.
The issue is that the recipe instructs you to use a 1″ to 1 1/2″ cookie scoop to portion out the dough. After measuring my cookie scoops, I can tell you that most closely aligns to a #60 – #40 cookie scoop. A #60 scoop holds 1 tbsp, while a #40 holds 2 tbsps. That’s means that the top end of this range is double the bottom end, that is a huge difference! Now, if only I had recalled that conversation with mom, or even measured my cookie scoops, before I embarked on my first attempt at making this recipe…

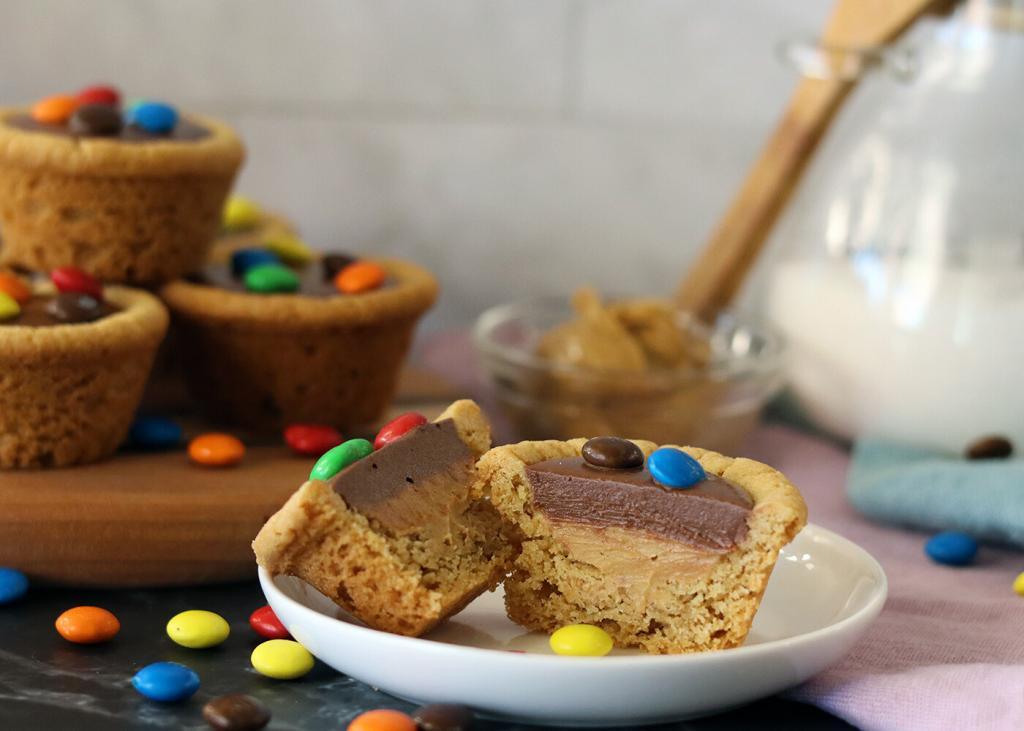
As you’ve probably guessed, I chose to start with the upper end of the spectrum and used my #40 cookie scoop. The cookie cup on the left in the image above was one of the neater of the resulting treats, but you can still see the spread of the cookie dough into an extended rim around the filling. Compare that with the example on the right, made using my #60 cookie scoop, which is neatly contained in a nice straight sided cup that ensures an even distribution of cookie and filling in every bite. Obviously, the size cookie scoop you use here is going to be a matter of personal preference. I prefer the smaller, neater cups for both aesthetics and filling to cookie ratios, but, it is worth noting, if you use the smaller cookie scoop, you’ll need two (24 cavity) standard mini muffin pans while the larger cookie scoop uses just one standard mini muffin pan. Luckily, I happen to own two standard mini muffin pans, so was able to complete my second, and, I believe, more successful attempt to make this recipe.
Equipment
Ingredients
Method
- Preheat your oven to 350°F. Grease your mini muffin pan(s) with shortening or cooking spray.
- In a large bowl, combine sugar, brown sugar, and butter. Beat with an electric mixer until light and fluffy.1/2 cup sugar, 1/2 cup brown sugar, 1/2 cup butter
- Add the peanut butter, egg and vanilla and blend well.1/2 cup peanut butter, 1 egg, 1 tsp vanilla
- Add the flour, baking soda and salt, mix until no dry ingredients remain visible.1 1/4 cup flour, 1 tsp baking soda, 1/4 tsp salt
- Use a cookie scoop (#60 [~32 cups] or #40 [~24 cups]) to portion the dough into each cup of the muffin pan(s). Press the dough lightly into the cups to make sure there are no gaps at the base.
- Bake in your preheated oven for 11-15 minutes or until the edges are deep golden brown. Allow to cool slightly (3-5 minutes) then use a dowel or the handle of a wooden spoon to press the center of each muffin cup down to make a small cookie cup with room for ~2 tbsp of filling.
- Place the white chocolate chips and 3/4 cup of the peanut butter in a medium microwave safe bowl. Heat in the microwave on a chocolate melting setting or in 30 second intervals stirring until smooth.1 1/2 cup peanut butter, 1 cup white chocolate chips
- Spoon or pipe ~1 tbsp of the white chocolate peanut butter mixture into each cookie cup using all of the mixture. Place in the refrigerator to set for 10 minutes.
- In the same bowl, place the semisweet chocolate chips and the remaining 3/4 cup of peanut butter. Heat in the microwave on a chocolate melting setting or in 30 second intervals stirring until smooth.1 cup semisweet chocolate chips, 1 1/2 cup peanut butter
- Remove the cookie cups from the refrigerator and spoon or pipe ~1 tbsp of the semisweet chocolate peanut butter mixture into each cookie cup, evenly over the top of the white chocolate peanut butter mixture, using all of the mixture.
- Decorate the top of each cup with a few mini M&Ms. Place in the refrigerator until completely set (~1 hour). Remove the cookie cups from the muffin pan(s), store in an airtight container at room temperature.mini M&Ms
Notes
- Peanut butter chips will double down on the peanut butter flavor
- Butterscotch chips, caramel chips or blonde chocolate chips will add a bit more depth and complexity of flavor